Have You Tried Angular Switch Yet
Introduction
Well, recently, I found that there were changes in the Angular structural directives, and the one change that caught my attention was Angular @switch.
But why did it stand out? It is simple to use compared to the former ngSwitch directive.
Before we begin, I would not call Angular @switch a structural directive, because it is not a directive, but it does serve the same role which is - changing the HTML DOM structure by adding or removing elements.
Think of Angular @switch as business logic, on the HTML, in the sense that it decides what should be visible to the user i.e added to the DOM when a given business logic is met, and what should be removed.
Example problem
For our business logic, we will use a very simple example. A business card.
-
This card will have a front face
-
It will also have a back face.
-
On the back, it will also have different options visible, based on the membership:
-
Basic
-
Advanced
-
Premium
So, translating these into rules, we can have them like this:
-
If face is front then show front face else show back face
-
If face is back:
-
If membership is basic then show basic content
-
Else if membership is advanced then show advanced content
-
Else if membership is premium then show premium content
Solution
The above problem can be solved using a TypeScript switch statement like this:
switch(this.activeFace) {

 case 'front':

   console.log('I am front face');

   break;

 case 'back':

   console.log('I am back face');

   switch (this.membership) {

     case 'basic':

       console.log('I am basic content')

       break;

     case 'advanced':

       console.log('I am advanced content')

       break;

     case 'premium':

       console.log('I am premium content')

       break;

     default:

       console.log('I am default content')

   }

   break;

}
Applying Angular @switch
With the above logic, we can now seamlessly incorporate @switch as below.
NB: You do not need to import anything in your component’s imports, because Angular @switch is available in Angular’s @angular/core package! Amazing! 🥳
@switch(activeFace) {

 @case('front') {

   <p>I am front face</p>

 }

 @case('back') {

   <div>

     <p>I am back face with more content to switch</p>

     @switch(membership) {

       @case('basic') {

         <p>I am basic content</p>

       }

       @case('advanced') {

         <p>I am advanced content</p>

       }

       @case('premium') {

         <p>I am premium content</p>

       }

       @default() {

         <p>I am default content</p>

       }

     }

   </div>

 }

}
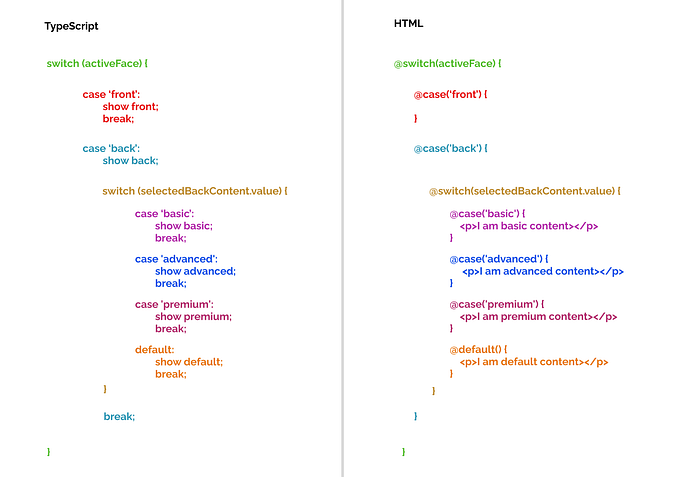
Side By Side Comparison
Well, from the above, we can clearly see that the TypeScript switch statement and Angular’s @switch are a 1:1 mapping, as portrayed below.

Conclusion
Well, clearly, it was really a seamless experience using Angular @switch.
This is really a straightforward approach to conditionally rendering content, and it is the approach I would recommend if you are on Angular 19 and beyond.
Always remember, you stop growing when you stop learning and what you learn, go forth and teach others that you may grow together.
And with that, until the next one.